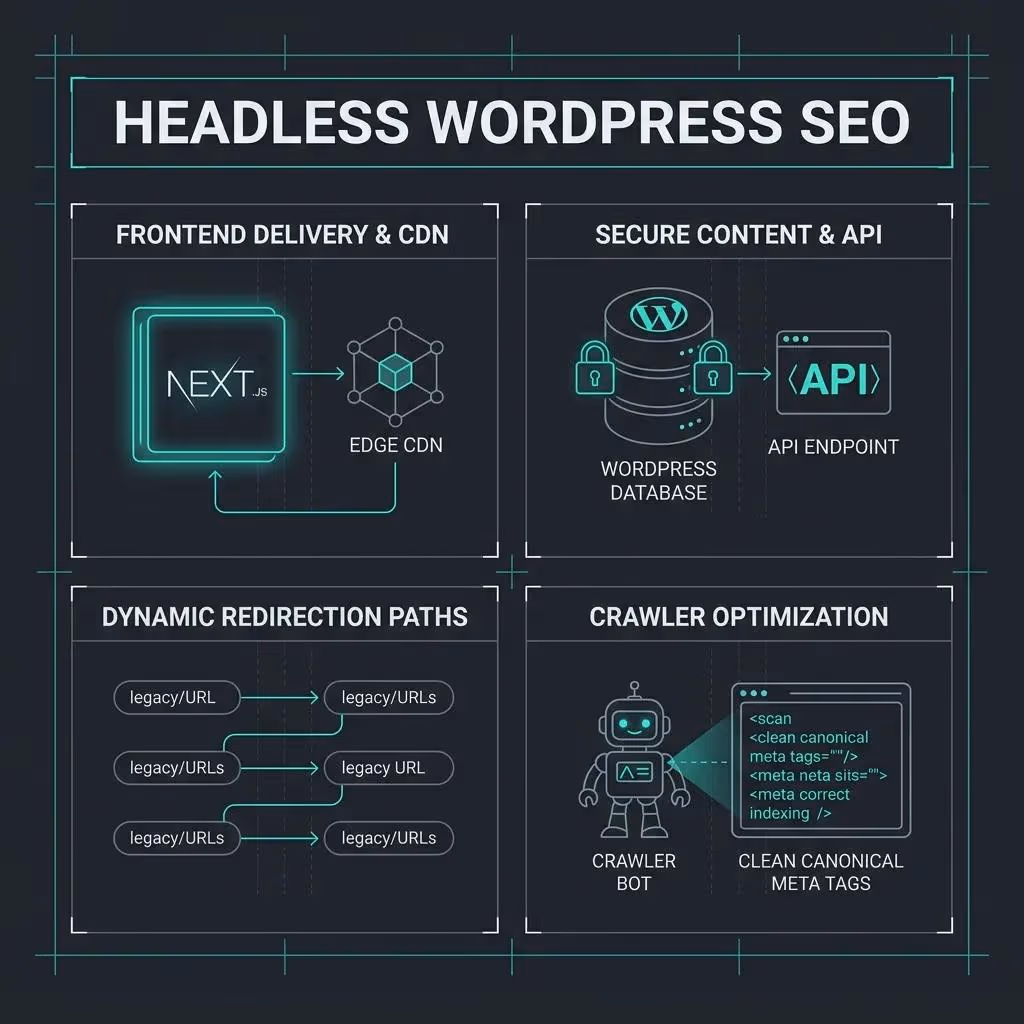
Headless WordPress SEO: Next.js 15 App Router Blueprint

This technical breakdown contains affiliate links. If you deploy this stack using my links, I earn a commission at no extra cost to you.
 Click to expand
It is 8:05 AM on a Tuesday, and your phone buzzes with a high-priority alert. A Slack notification from your SEO manager contains a single, stomach-churning screenshot: organic search traffic is down 45% week-over-week. Your client's new decoupled website—a high-performance speed miracle that launched just ten days ago—has suffered a sudden and catastrophic search index collapse. This is the ultimate nightmare scenario of headless wordpress seo, where lightning-fast load times are completely invalidated by a silent indexation failure.
When you decouple the presentation layer from the content management system, separating WordPress from modern libraries like React and frameworks like Next.js, you break the implicit, out-of-the-box SEO configurations. Constructing a successful headless cms seo strategy requires manual orchestration, as decoupling shifts the responsibility of rendering metadata from PHP templates to JavaScript. In a traditional monolith, WordPress templates and SEO plugins work in unison to automatically inject correct canonical tags, sitemaps, and meta headers. Once decoupled, however, WordPress is relegated to a headless JSON API that continues to generate SEO metadata based on the backend environment, passing URLs pointing to the CMS host. For developers implementing decoupled wordpress seo or utilizing server-side rendering (SSR) seo pipelines, failing to rewrite these backend API hosts results in search crawlers indexing raw database staging domains, causing search engines to de-index the public frontend pages entirely.
Why Does Headless WordPress Cause Duplicate Content and Canonical Issues?
Headless WordPress architecture causes duplicate content issues when canonical tags default to the backend WordPress API domain (e.g., cms.domain.com) instead of the public-facing frontend domain (e.g., www.domain.com), leading search engines to index the backend, de-index the frontend, and split search authority.
The Technical Roots of the Indexation Trap
Traditional WordPress installations store the site and homepage addresses directly in the database (wp_options table under siteurl and home). Monolithic SEO plugins like Yoast SEO, Rank Math, or SEOPress read these options to construct absolute canonical URLs.
When you query posts via the WordPress REST API or WPGraphQL, the CMS serializes this SEO metadata in its raw, backend-oriented state. A headless frontend querying these endpoints will render the canonical link exactly as it is received from the API. Consequently, the public pages served by your React or Next.js app will contain metadata pointing back to your CMS instance:
<!-- Rendered on https://www.example.com/blog-post/ -->
<link rel="canonical" href="https://cms.example.com/blog-post/" />
This configuration triggers a duplicate content headless cms crisis. Search engine crawlers (such as Googlebot) treat the canonical tag as a definitive pointer to the authoritative version of the page. If the public frontend points to the CMS subdomain as its canonical source, the crawler follows the instruction, indexes the CMS domain, and removes the public frontend from indexation.
Furthermore, if your WordPress backend is not behind a strict firewall, crawlers will index both the public Next.js site and the staging/CMS WordPress installation. This splits your crawl budget, dilutes backlink equity, and triggers duplicate content penalties as search engines struggle to determine which domain is the primary source of truth.
The Crawler Confusion Lifecycle
The ASCII diagram below illustrates the routing loop and crawler confusion that occurs when backend metadata is served unmodified to public crawlers:
                              [ SEARCH ENGINE CRAWLER ]
                                          |
                              +-----------+-----------+
                              |                       |
             (Requests www.domain.com)       (Requests cms.domain.com)
                              |                       |
                              v                       v
                   +--------------------+  +--------------------+
                   |  Next.js Frontend  |  | WordPress Backend  |
                   |  (Public Website)  |  | (API Content Hub)  |
                   +--------------------+  +--------------------+
                              |                       |
                       Renders HTML            Serves WPGraphQL
                       Metadata from API       Metadata natively
                              |                       |
                              v                       v
                   +--------------------------------------------+
                   |  <link rel="canonical"                     |
                   |  href="https://cms.domain.com/blog-post">  |
                   +--------------------------------------------+
                                          |
                              +-----------+-----------+
                              |                       |
                              v                       v
                [ Crawler De-indexes Frontend ]  [ Crawler Indexes CMS Backend ]
                   Public site disappears          Exposes raw backend URLs
                   from search results.            to user search results.
The Solution: Dynamic Host Replacement
To resolve this issue, you must intercept the metadata received from WordPress and rewrite wordpress cms domain canonical urls to match the public-facing URL scheme before rendering the page headers. This requires configuring a dynamic host replacement utility on the frontend that recursively traverses the API response—including sitemaps, post content, and canonical fields—replacing instances of the CMS domain with your public domain.
Implementation in Next.js 15 (App Router)
Below is a robust, production-ready TypeScript implementation showing how to clean up SEO metadata dynamically using the nextjs metadata API canonical configuration.
First, create a utility file to recursively replace domain names within nested metadata objects:
// utils/seo.ts

/**
 * Recursively searches through arrays, strings, and objects to replace
 * WordPress CMS domain instances with the public frontend domain.
 */
export function replaceWordPressUrls<T>(data: T, cmsUrl: string, frontendUrl: string): T {
  if (!data) return data;

  if (typeof data === 'string') {
    // Escape regex characters in the cmsUrl to prevent syntax issues
    const escapedCmsUrl = cmsUrl.replace(/[-\/\\^$*+?.()|[\]{}]/g, '\\$&');
    const regex = new RegExp(escapedCmsUrl, 'gi');
    return data.replace(regex, frontendUrl) as unknown as T;
  }

  if (Array.isArray(data)) {
    return data.map((item) => replaceWordPressUrls(item, cmsUrl, frontendUrl)) as unknown as T;
  }

  if (typeof data === 'object') {
    const updatedObj: Record<string, any> = {};
    for (const key in data) {
      if (Object.prototype.hasOwnProperty.call(data, key)) {
        updatedObj[key] = replaceWordPressUrls(data[key], cmsUrl, frontendUrl);
      }
    }
    return updatedObj as unknown as T;
  }

  return data;
}
Next, use this utility inside your Next.js 15 App Router dynamic page. Note that in Next.js 15, params is a Promise and must be awaited before accessing properties:
// app/[slug]/page.tsx
import { Metadata } from 'next';
import { replaceWordPressUrls } from '@/utils/seo';

interface PageProps {
  params: Promise<{
    slug: string;
  }>;
}

interface SeoGraphData {
  title?: string;
  metaDesc?: string;
  canonical?: string;
  opengraphTitle?: string;
  opengraphDescription?: string;
  opengraphImage?: {
    sourceUrl: string;
  };
}

async function getPostSeoData(slug: string): Promise<SeoGraphData | null> {
  const query = `
    query GetPostSEO($slug: ID!) {
      post(id: $slug, idType: URI) {
        seo {
          title
          metaDesc
          canonical
          opengraphTitle
          opengraphDescription
          opengraphImage {
            sourceUrl
          }
        }
      }
    }
  `;

  try {
    const res = await fetch(process.env.WORDPRESS_API_URL!, {
      method: 'POST',
      headers: { 'Content-Type': 'application/json' },
      body: JSON.stringify({ query, variables: { slug } }),
      next: { revalidate: 3600 } // Cache API response for 1 hour
    });

    const { data } = await res.json();
    return data?.post?.seo || null;
  } catch (error) {
    console.error('Failed to fetch SEO metadata:', error);
    return null;
  }
}

export async function generateMetadata({ params }: PageProps): Promise<Metadata> {
  // Await params in compliance with Next.js 15 specifications
  const { slug } = await params;
  const seoData = await getPostSeoData(slug);

  if (!seoData) {
    return {
      title: 'Post Not Found',
    };
  }

  const cmsUrl = process.env.NEXT_PUBLIC_WORDPRESS_URL!;       // e.g., https://cms.domain.com
  const frontendUrl = process.env.NEXT_PUBLIC_FRONTEND_URL!;   // e.g., https://www.domain.com

  // Clean canonical and description tags
  const cleanCanonical = replaceWordPressUrls(seoData.canonical || '', cmsUrl, frontendUrl);
  const cleanTitle = replaceWordPressUrls(seoData.title || '', cmsUrl, frontendUrl);
  const cleanDesc = replaceWordPressUrls(seoData.metaDesc || '', cmsUrl, frontendUrl);

  return {
    title: cleanTitle,
    description: cleanDesc,
    alternates: {
      canonical: cleanCanonical,
    },
    openGraph: {
      title: seoData.opengraphTitle ? replaceWordPressUrls(seoData.opengraphTitle, cmsUrl, frontendUrl) : cleanTitle,
      description: seoData.opengraphDescription ? replaceWordPressUrls(seoData.opengraphDescription, cmsUrl, frontendUrl) : cleanDesc,
      url: cleanCanonical,
      type: 'article',
      images: seoData.opengraphImage?.sourceUrl
        ? [{ url: replaceWordPressUrls(seoData.opengraphImage.sourceUrl, cmsUrl, frontendUrl) }]
        : [],
    },
  };
}

export default async function Page({ params }: PageProps) {
  const { slug } = await params;
  return (
    <main style={{ padding: '2rem', maxWidth: '800px', margin: '0 auto' }}>
      <article>
        <h1>Dynamically Rendered Post: {slug}</h1>
        <p>This page dynamically transforms backend WordPress URLs into production-ready frontend canonical links.</p>
      </article>
    </main>
  );
}
Step-by-Step Marketer Verification Rule
Because canonical tags reside in the page <head> and do not alter the visual layout of the page, content editors and marketers must verify them directly in the browser.
https://www.example.com/blog-post/).- Windows/Linux:
Ctrl + U - macOS:
Cmd + Option + U
Ctrl + F (Windows) or Cmd + F (macOS).<link rel="canonical" into the search box.href Hostname: Ensure the URL matches your public frontend domain exactly. If the hostname shows cms.domain.com or localhost, the rewrite configuration is failing.og:url using the find tool. The content attribute must point to the public frontend domain.og:image, are routed through your public CDN or media domain rather than exposing the absolute backend file library directory path.🛠️ Scan Your Decoupled Meta Configuration Natively
Before you push your Next.js application to production, you must ensure that your SEO metadata, canonical URLs, and header rules are clean. You can use our Web Audit Engine to perform a comprehensive, 15-second diagnostic on your headless environment. It will parse your site's raw HTML payload, verify redirects, analyze server response latency, and check for any hidden indexation blocks.
How Do You Sync WordPress Redirect Rules with a Decoupled Next.js Frontend?
 Click to expand
To maintain organic rankings, dynamic redirects edge middleware must sync URL mapping rules from WordPress plugins (such as Redirection or Rank Math) via REST API and execute them inside Next.js middleware redirects, bypassing standard PHP template rendering to resolve paths at the edge and prevent catastrophic 404 crawl spikes.
The Routing Gap: Why Traditional WordPress Redirection Fails
In a monolithic WordPress setup, redirects are handled dynamically inside the PHP execution thread. Plugins like Redirection hook into the template_redirect or init actions, inspect the request URI, query the database, and issue a HTTP header redirect (header("Location: ...")) before the page renders.
However, in a decoupled architecture:
next.config.js or vercel.json is static. It has a strict limit of 1,024 routes and requires a full site rebuild and deployment for every new redirect. This is a non-starter for editors who configure hundreds of redirects a week.To resolve this, we leverage dynamic redirects edge middleware coupled with an edge-caching mechanism that pulls a 301 redirect map json from WordPress and processes it at the Edge.
Middleware Request Lifecycle Flow
Here is how the dynamic redirects edge middleware intercepts requests, executes fast cache checks, and falls back gracefully when the origin CMS is unresponsive:
                     [ Incoming Request (User / Crawler) ]
                                       │
                                       ▼
                      [ Next.js Edge Middleware Router ]
                                       │
                     Is route excluded? (static/API assets)
                                   /         \
                              YES /           \ NO
                                 /             ▼
                                v        [ Local In-Memory Cache ]
                      [ Next.js Route ]       (301 Redirect Map)
                                                   │
                                            Does route exist?
                                           /                 \
                                    YES   /                   \ NO (Miss/Stale)
                                         /                     ▼
                                        v             [ WP REST Redirects API ]
                                 [ 301 Redirect ]     (With Timeout/Circuit Breaker)
                                 (Return to User)              │
                                                       WP API responds?
                                                      /                \
                                               YES   /                  \ NO (Fail/Timeout)
                                                    /                    ▼
                                                   v             [ Next.js Route ]
                                            [ Update Cache ]       (Pass through)
                                            [ 301 Redirect ]
Production Implementation Code
1. Next.js Edge Middleware (middleware.ts)
Save this file in the root of your Next.js project. It implements path exclusions to skip static assets, processes dynamic routing inside the Edge Runtime, uses global memory caching, and utilizes an AbortController as a circuit breaker to protect TTFB if the WordPress API times out.
import { NextResponse } from 'next/server';
import type { NextRequest } from 'next/server';

// Exclude static assets, Next.js system routes, and media files to minimize invocation costs
const EXCLUDED_PATTERNS = [
  /^\/_next/,
  /^\/api\//,
  /^\/static\//,
  /^\/favicon\.ico/,
  /^\/sitemap\.xml/,
  /^\/robots\.txt/,
  /\.(png|jpe?g|gif|svg|webp|ico|css|js)$/i,
  /^\/$/,
];

interface RedirectRule {
  url: string;
  action_data: {
    url: string;
  };
  action_code: number;
}

interface CacheStore {
  data: Record<string, { target: string; code: number }> | null;
  lastFetched: number;
}

// In-memory cache persisted across warm Edge functions (Vercel/Cloudflare instances)
const cache: CacheStore = {
  data: null,
  lastFetched: 0,
};

const CACHE_TTL = 300000; // Cache duration in milliseconds (5 Minutes)
const TIMEOUT_MS = 1500;  // 1.5s circuit breaker timeout to protect TTFB

export async function middleware(request: NextRequest) {
  const { pathname, search } = request.nextUrl;

  // 1. Path Exclusion Check
  if (EXCLUDED_PATTERNS.some((pattern) => pattern.test(pathname))) {
    return NextResponse.next();
  }

  const now = Date.now();
  const WORDPRESS_API = `${process.env.NEXT_PUBLIC_WORDPRESS_URL}/wp-json/custom/v1/redirects`;

  // 2. Fetch and Cache 301 Redirect Map JSON from Headless WordPress
  if (!cache.data || now - cache.lastFetched > CACHE_TTL) {
    try {
      const controller = new AbortController();
      const timeoutId = setTimeout(() => controller.abort(), TIMEOUT_MS);

      const response = await fetch(WORDPRESS_API, {
        signal: controller.signal,
        headers: { 'Accept': 'application/json' },
        next: { revalidate: 300 }, // Enable Next.js fetch-level caching
      });

      clearTimeout(timeoutId);

      if (response.ok) {
        const rawRedirects: RedirectRule[] = await response.json();
        const redirectMap: Record<string, { target: string; code: number }> = {};

        // Convert array to O(1) hash map for sub-millisecond edge matching
        rawRedirects.forEach((rule) => {
          if (rule.url && rule.action_data?.url) {
            const cleanedSource = cleanPath(rule.url);
            redirectMap[cleanedSource] = {
              target: rule.action_data.url,
              code: rule.action_code || 301,
            };
          }
        });

        cache.data = redirectMap;
        cache.lastFetched = now;
      }
    } catch (error) {
      // Circuit Breaker: Fail-open to avoid blocking requests if the WordPress CMS is down or slow
      console.error('WordPress redirects endpoint timed out or failed:', error);
    }
  }

  // 3. Match Route and execute redirect
  if (cache.data) {
    const cleanedPath = cleanPath(pathname);
    const matchedRule = cache.data[cleanedPath];

    if (matchedRule) {
      const redirectUrl = new URL(matchedRule.target, request.url);

      // Carry forward original search query params (e.g. UTM tracking)
      if (search && !redirectUrl.search) {
        redirectUrl.search = search;
      }

      return NextResponse.redirect(redirectUrl, matchedRule.code);
    }
  }

  return NextResponse.next();
}

function cleanPath(path: string): string {
  return path.replace(/^\/|\/$/g, '').toLowerCase();
}
2. Headless WordPress API Handler (functions.php)
Add this code to your WordPress active theme's functions.php file (or wrap it in a custom site plugin). It exposes the active redirection rules from the Redirection plugin database table via a highly performant custom REST route.
<?php
/**
 * Register custom REST API route to expose Redirection table rules to Next.js
 */
add_action('rest_api_init', function () {
    register_rest_route('custom/v1', '/redirects', [
        'methods'             => WP_REST_Server::READABLE,
        'callback'            => 'get_headless_redirect_rules_map',
        'permission_callback' => '__return_true', // Publicly cached endpoint
    ]);
});

/**
 * Query active redirects from the database and output them in a formatted response
 *
 * @return WP_REST_Response
 */
function get_headless_redirect_rules_map() {
    global $wpdb;

    // Table used by the 'Redirection' plugin
    $table_name = $wpdb->prefix . 'redirection_items';

    // Fallback if the plugin is deactivated or table doesn't exist
    if ($wpdb->get_var("SHOW TABLES LIKE '{$table_name}'") !== $table_name) {
        return new WP_REST_Response([], 200);
    }

    // Retrieve active exact-match URL redirection rules
    $results = $wpdb->get_results("
        SELECT url, action_data, action_code
        FROM {$table_name}
        WHERE status = 'active' AND match_type = 'url'
    ", ARRAY_A);

    $formatted_rules = [];

    foreach ($results as $row) {
        $formatted_rules[] = [
            'url'         => $row['url'],
            'action_data' => [
                'url' => $row['action_data']
            ],
            'action_code' => intval($row['action_code']),
        ];
    }

    $response = new WP_REST_Response($formatted_rules, 200);

    // Attach cache headers so proxy CDN services (e.g. Cloudflare) cache this payload
    $response->header('Cache-Control', 'public, max-age=300, stale-while-revalidate=60');

    return $response;
}
How Do I Create a Dynamically Synchronized Sitemap in Next.js App Router?
To create a dynamically synchronized sitemap in headless WordPress, you must disable the native WordPress XML sitemaps and implement a dynamic Route Handler or a Next.js app/sitemap.ts configuration to programmatically fetch published slugs via WPGraphQL and serve localized, correct front-end XML URLs.
The Problem: Decoupled URLs and Domain Mismatch
When running headless WordPress on backend hosting environments like WP Engine, the CMS functions on a backend subdomain (e.g., api.example.com), while the user-facing site lives on a primary frontend domain (e.g., example.com). By default, native WordPress sitemaps or those generated by popular plugins (like Yoast SEO or Rank Math) will output backend URLs. If search engine crawlers index these sitemaps, they will discover and attempt to index the decoupled backend database pages. This results in duplicate content issues, indexation bloat, and a severely degraded crawl budget.
Furthermore, static sitemap files do not update automatically when new posts are published, unless a new build is triggered.
Overcoming Build-Time Limits & Server Timeouts
In a large-scale headless WordPress site containing thousands of articles, pages, and custom post types (CPTs), generating a single sitemap during build execution introduces significant architectural challenges:
504 Gateway Timeout errors.The Solution: Batch-Paginated Cursor Fetches and Sitemap Indices
Instead of running a single, heavy query, we leverage cursor-based pagination via WPGraphQL's contentNodes field to batch requests in groups of 100. By recursing over the pageInfo.hasNextPage and pageInfo.endCursor values, we cleanly walk the entire dataset without overloading the server.
Additionally, we use Next.js's native segment configuration to cache sitemap responses on the edge using an incremental static regeneration sitemap cache. This serves the cached XML file instantly and regenerates it in the background when the revalidation time expires.
Compilation Flow: How Next.js Paginated Sitemap Construction Works
This diagram illustrates how Next.js orchestrates the cursor-based pagination to build the sitemap dynamically at the edge:
+-----------------------------------------------------------------+
|                       WordPress Database                        |
|             (Stores Posts, Pages, & Custom Post Types)          |
+-------------------------------#---------------------------------+
                                |
                   [ GraphQL / REST API Request ]
                                |
                                v
+-----------------------------------------------------------------+
|                      WPGraphQL Gateway                          |
|         (Cursor-based Pagination: batches of 100 nodes)         |
+-------------------------------#---------------------------------+
                                |
          +---------------------+---------------------+
          | Fetch Batch 1       | Fetch Batch 2       | Fetch Batch N
          v                     v                     v
+------------------+  +------------------+  +------------------+
| cursor: "XYZ1"   |  | cursor: "XYZ2"   |  | cursor: "XYZN"   |
+--------+---------+  +--------+---------+  +--------+---------+
         |                     |                     |
         +---------------------+---------------------+
                                |
                                v
+-----------------------------------------------------------------+
|            Next.js App Router (app/sitemap.ts)                  |
|    - Maps backend API domains to frontend production domains    |
|    - Handles Incremental Static Regeneration sitemap cache      |
+-------------------------------#---------------------------------+
                                |
                                v
+-----------------------------------------------------------------+
|                 Dynamic XML Sitemap Index                       |
|   sitemap.xml -> [sitemap/0.xml, sitemap/1.xml, ... sitemap/N]  |
+-----------------------------------------------------------------+
Implementation: Dynamic app/sitemap.ts Route Handler
Below is the complete implementation of a nextjs sitemap.ts dynamic file. Place this file inside your Next.js project at app/sitemap.ts (or src/app/sitemap.ts).
import { MetadataRoute } from 'next';

const WP_API_URL = process.env.WORDPRESS_API_URL || 'https://api.example.com/graphql';
const FRONTEND_URL = process.env.NEXT_PUBLIC_SITE_URL || 'https://example.com';

interface WPGraphQLNode {
  uri: string;
  modified: string;
}

interface GraphQLSitemapResponse {
  data: {
    contentNodes: {
      pageInfo: {
        hasNextPage: boolean;
        endCursor: string;
      };
      nodes: WPGraphQLNode[];
    };
  };
}

// Define ISR Revalidation Period (1 day = 86400 seconds)
// This powers the incremental static regeneration sitemap cache
export const revalidate = 86400;

/**
 * Recursively fetches all published WordPress slugs using cursor-based pagination
 */
async function fetchAllWPUrls(
  endCursor: string | null = null,
  accumulatedNodes: WPGraphQLNode[] = []
): Promise<WPGraphQLNode[]> {
  const query = `
    query GetSitemapNodes($first: Int!, $after: String) {
      contentNodes(
        first: $first
        after: $after
        where: { status: PUBLISH }
      ) {
        pageInfo {
          hasNextPage
          endCursor
        }
        nodes {
          uri
          modified
        }
      }
    }
  `;

  try {
    const response = await fetch(WP_API_URL, {
      method: 'POST',
      headers: {
        'Content-Type': 'application/json',
      },
      body: JSON.stringify({
        query,
        variables: {
          first: 100, // Safe batch size to prevent server timeouts
          after: endCursor,
        },
      }),
      next: { revalidate: 86400 }, // Internal Next.js fetch cache integration
    });

    if (!response.ok) {
      throw new Error(`WordPress API returned status ${response.status}`);
    }

    const result: GraphQLSitemapResponse = await response.json();
    const { nodes, pageInfo } = result.data.contentNodes;
    const updatedAccumulation = [...accumulatedNodes, ...nodes];

    if (pageInfo.hasNextPage && pageInfo.endCursor) {
      return fetchAllWPUrls(pageInfo.endCursor, updatedAccumulation);
    }

    return updatedAccumulation;
  } catch (error) {
    console.error('Failed to fetch WordPress nodes for sitemap generation:', error);
    return accumulatedNodes; // Fallback to whatever has been successfully fetched
  }
}

export default async function sitemap(): Promise<MetadataRoute.Sitemap> {
  const wordpressNodes = await fetchAllWPUrls();

  // Map backend paths to target frontend production domains
  const dynamicRoutes = wordpressNodes.map((node) => ({
    url: `${FRONTEND_URL}${node.uri === '/' ? '' : node.uri}`,
    lastModified: new Date(node.modified),
    changeFrequency: 'weekly' as const,
    priority: 0.7,
  }));

  // Include static core routing URLs
  const staticRoutes = [
    {
      url: FRONTEND_URL,
      lastModified: new Date(),
      changeFrequency: 'daily' as const,
      priority: 1.0,
    },
  ];

  return [...staticRoutes, ...dynamicRoutes];
}
Alternative: Native sitemap.ts vs next-sitemap npm package
While many developers default to installing the third-party next-sitemap npm package, there are major structural trade-offs to evaluate when building a headless architecture:
| Feature / Capability | Native Next.js sitemap.ts (Dynamic) | next-sitemap npm package (Static/Build-time) |
|---|---|---|
| Generation Model | Dynamic, SSR-driven, or edge-computed on the fly. | Build-time pre-rendered script using static routes. |
| ISR Integration | Native. Updates automatically using incremental static regeneration sitemap cache settings. | Requires a manual build process or secondary cron job trigger. |
| Dynamic Indexing | Built-in using generateSitemaps() for up to 50k+ URLs natively. | Requires custom configuration schema and files. |
| Serverless Friendly | High. Fetches payload data sequentially on-demand. | Medium. Increases build overhead and CI pipeline costs. |
Best Practice Choice: If you are running static HTML exports (output: 'export'), the next-sitemap npm package is the correct choice because dynamic server features are unavailable. However, for standard headless environments hosted on platforms like Vercel, Netlify, or self-hosted Node servers, using the nextjs sitemap.ts dynamic configuration is superior due to its native caching and automated background updates.
How Does Preview Mode Work Securely in a Headless WordPress Setup?
Headless preview mode utilizes Next.js Draft Mode to set secure cookie tokens that bypass static CDN caches, allowing editors to preview WordPress drafts in real-time. By validating preview requests through a cryptographic handshake, the decoupled frontend fetches raw draft content directly from the WordPress API without exposing private edits to the public.
The Need for Dynamic Headless Previews
In a traditional WordPress environment, previewing a draft is handled seamlessly because the CMS is tightly coupled to the theme layer. When an editor clicks "Preview," WordPress queries the database for the autosaved draft, renders it using the PHP template hierarchy, and displays it immediately.
In a decoupled headless architecture, however, the frontend is hosted on a separate infrastructure (e.g., Vercel, Netlify) and pre-renders pages as static HTML at build time. Because these pages are stored permanently at the CDN edge to optimize performance and core web vitals, editing a post in WordPress does not trigger a frontend rebuild. To bridge this gap, developers must implement nextjs draft mode to dynamically bypass the static cache for authenticated editors.
The Secure JWT Token Handshake
To prevent malicious actors from guessing draft IDs and viewing unpublished content, the transition from the WordPress backend to the Next.js preview environment must be cryptographically secured. This is achieved using wpgraphql jwt authentication.
The process unfolds as follows:
/api/draft route, passing the post ID, a shared preview secret, and the JWT token.draftMode().enable(). This sets an encrypted cookie (__prerender_bypass) on the editor's browser.Here is the secure communication sequence:
+-------------------+             +------------------+             +----------------------+
|  WordPress Admin  |             |  Editor Browser  |             | Next.js Server (API) |
+-------------------+             +------------------+             +----------------------+
          |                                |                                   |
          | 1. Click "Preview"             |                                   |
          |    Generate JWT                |                                   |
          |------------------------------->|                                   |
          |                                | 2. Redirect to Next.js API        |
          |                                |    GET /api/draft?secret&id&token |
          |                                |---------------------------------->|
          |                                |                                   |
          |                                |                                   | 3. Validate secret
          |                                |                                   | 4. Fetch draft via
          |                                |                                   |    WPGraphQL with JWT
          |                                |                                   |<-----------------+
          |                                |                                   |                  |
          |                                |                                   | 5. Return draft  |
          |                                |                                   |----------------->|
          |                                |                                   |
          |                                |                                   | 6. Enable Draft Mode
          |                                |                                   |    (Set bypass cookie)
          |                                |                                   | 7. Redirect to slug
          |                                |<----------------------------------|
          |                                |
          |                                | 8. GET /blog/post-slug (with cookie)
          |                                |---------------------------------->|
          |                                |                                   | 9. Bypass CDN cache,
          |                                |                                   |    fetch draft data,
          |                                |                                   |    render dynamically
          |                                |                                   |    with 'noindex'
          |                                |<----------------------------------|
          |                                | 10. Display preview page          |
          v                                v                                   v
Protecting Previews from Search Indexing
A major concern when rendering pages dynamically is search engine optimization (SEO) pollution. If search crawlers discover draft URLs or if draft mode pages accidentally leak, search engines might index incomplete drafts, leading to duplicate content penalties or public exposure of sensitive information.
To guarantee that draft pages are never indexed, your Next.js layout or template must inspect the Draft Mode state and inject the noindex robots directive:
- In Next.js App Router, you can use the
draftMode()helper inside yourgenerateMetadatafunction to setrobots: { index: false, follow: false }. - This ensures that any dynamically rendered preview page outputting to the browser will contain
<meta name="robots" content="noindex, nofollow" />, notifying Googlebot and other crawlers to ignore the URL.
Code Implementation
1. Next.js Draft Route Handler (/app/api/draft/route.ts)
import { draftMode } from 'next/headers';
import { redirect } from 'next/navigation';

export async function GET(request: Request) {
  const { searchParams } = new URL(request.url);
  const secret = searchParams.get('secret');
  const id = searchParams.get('id');
  const token = searchParams.get('token'); // JWT token from WordPress

  // 1. Verify the shared secret to prevent spoofing
  if (secret !== process.env.WORDPRESS_PREVIEW_SECRET || !id) {
    return new Response('Invalid preview secret', { status: 401 });
  }

  // 2. Validate the JWT token and draft existence against WPGraphQL
  try {
    const response = await fetch(process.env.WORDPRESS_API_URL!, {
      method: 'POST',
      headers: {
        'Content-Type': 'application/json',
        'Authorization': token ? `Bearer ${token}` : '',
      },
      body: JSON.stringify({
        query: `
          query GetPreviewPost($id: ID!) {
            post(id: $id, idType: DATABASE_ID) {
              slug
              status
            }
          }
        `,
        variables: { id },
      }),
    });

    const { data } = await response.json();

    if (!data?.post) {
      return new Response('Draft post not found or unauthorized', { status: 404 });
    }

    // 3. Enable Next.js Draft Mode (sets the secure __prerender_bypass cookies)
    draftMode().enable();

    // 4. Redirect to the dynamic path, escaping preview queries
    const targetPath = `/blog/${data.post.slug || id}`;
    redirect(targetPath);
  } catch (error) {
    return new Response('Error initiating preview draft mode', { status: 500 });
  }
}
2. Next.js Disable Draft Route Handler (/app/api/disable-draft/route.ts)
import { draftMode } from 'next/headers';
import { redirect } from 'next/navigation';

export async function GET(request: Request) {
  // Clear preview cookies to return to normal static generation mode
  draftMode().disable();

  const { searchParams } = new URL(request.url);
  const redirectPath = searchParams.get('redirect') || '/';

  redirect(redirectPath);
}
3. WordPress Custom Preview Link Filter (functions.php)
/**
 * Redirect WordPress custom preview links to the headless Next.js frontend.
 */
add_filter('preview_post_link', 'headless_custom_preview_link', 10, 2);

function headless_custom_preview_link($preview_link, $post) {
    // Only apply modifications to posts and standard custom pages
    if (!in_array($post->post_type, ['post', 'page'])) {
        return $preview_link;
    }

    $frontend_url = 'https://your-frontend-domain.com'; // Next.js site URL
    $preview_secret = getenv('WORDPRESS_PREVIEW_SECRET') ?: 'your_shared_preview_secret';

    // Generate the WPGraphQL JWT Token for the current editor session.
    $jwt_token = '';
    if (class_exists('WPGraphQL\JWT_Auth\Helper')) {
        $user_id = get_current_user_id();
        $jwt_token = WPGraphQL\JWT_Auth\Helper::get_token($user_id);
    }

    // Reconstruct the URL redirecting to the API draft handler
    return sprintf(
        '%s/api/draft?secret=%s&id=%d&token=%s',
        $frontend_url,
        urlencode($preview_secret),
        $post->ID,
        urlencode($jwt_token)
    );
}
How Do You Configure On-Demand ISR Revalidation Webhooks?
On-demand ISR revalidation webhooks trigger a Next.js cache purge route (/api/revalidate) when a post is updated in WordPress, instantly making content changes public. This architecture bypasses standard CDN cache latencies, enabling search engines and site visitors to see updated pages within milliseconds without full site rebuilds.
Maintaining Parity with On-Demand Cache Invalidation
While preview mode handles private drafts, published posts require immediate public updates across all static routes. Under standard Incremental Static Regeneration (ISR) configuration, routes specify a timed revalidation window (e.g., revalidate = 3600 seconds). This means when an editor corrects a typo or updates critical information, the outdated version persists for up to an hour at the edge.
For technical SEO and breaking news portals, this latency is unacceptable. We must enforce on-demand cache invalidation. By setting up webhooks in WordPress that trigger on post transitions (such as publishing, updating, or deletion), the CMS calls the Next.js /api/revalidate route. This route runs the revalidatePath API to flush Vercel's or Next.js's static server cache, ensuring subsequent page loads compile fresh markup using updated database entries.
Code Implementation
Next.js Revalidation Endpoint (/app/api/revalidate/route.ts)
import { revalidatePath } from 'next/cache';
import { NextRequest, NextResponse } from 'next/server';

export async function POST(request: NextRequest) {
  try {
    const { searchParams } = new URL(request.url);
    const secret = searchParams.get('secret');

    // 1. Authenticate the revalidation webhook request
    if (secret !== process.env.REVALIDATION_SECRET) {
      return NextResponse.json({ message: 'Invalid token' }, { status: 401 });
    }

    const body = await request.json();
    const slug = body.slug || body.post?.post_name;
    const postType = body.post_type || body.post?.post_type;

    if (!slug) {
      return NextResponse.json({ message: 'Slug is required for revalidation' }, { status: 400 });
    }

    // 2. Resolve target routes based on taxonomy/post types
    const targetPath = postType === 'page' ? `/${slug}` : `/blog/${slug}`;

    // 3. Purge Next.js static page cache for target path and indexes
    revalidatePath(targetPath);
    revalidatePath('/');
    revalidatePath('/blog');

    return NextResponse.json({
      revalidated: true,
      path: targetPath,
      timestamp: Date.now()
    });
  } catch (error: any) {
    return NextResponse.json({
      message: 'Revalidation failed',
      error: error.message
    }, { status: 500 });
  }
}
How Do You Prevent Cumulative Layout Shift (CLS) from WordPress HTML Images?
You prevent Cumulative Layout Shift (CLS) in headless WordPress architectures by parsing the raw HTML database payload server-side and programmatically rewriting standard HTML <img> tags into optimized Next.js <Image> components containing explicit height and width attributes that reserve layout space before rendering.
The Cause of Decoupled CLS Failures
When content editors upload media via the Gutenberg block editor or write classic HTML posts, monolithic WordPress inserts standard <img> tags with absolute source attributes pointing to the database server. When these raw markup strings are queried via WPGraphQL or the REST API and injected into the frontend using React's dangerouslySetInnerHTML, the browser receives unoptimized elements:
<!-- Raw WordPress Database Payload -->
<img src="https://cms.whoisalfaz.me/wp-content/uploads/2026/06/hero-banner.png" alt="Decoupled Architecture" class="aligncenter size-large" />
Because modern web browsers do not know the image's dimensions before downloading the asset, they cannot calculate the container height beforehand. As a result, the webpage text and elements below the image shift down violently when the media file finishes loading, triggering a significant Cumulative Layout Shift (CLS). In technical SEO, high CLS scores degrade the Core Web Vitals, leading to a poorer page experience score and lower rankings in Google's mobile and desktop indexes.
The Solution: Server-Side Element Rewriting
To resolve this layout instability, you must compile and run a parser component on your Next.js server. When rendering the body of a dynamic post or page, you parse the raw content string, match all occurrences of standard image elements, extract their attributes, and map them to Next.js's optimized, layout-stable dynamic rendering components.
Below is a production-ready React Server Component (RSC) implementation in Next.js 15 that parses raw database HTML, replaces backend URLs with the public frontend domain, extracts image dimensions, and outputs optimized <Image> components with lazy loading configurations:
// components/PostBody.tsx
import React from 'react';
import Image from 'next/image';
import parse, { HTMLReactParserOptions, Element } from 'html-react-parser';

interface PostBodyProps {
  content: string;
  cmsUrl: string;
  frontendUrl: string;
}

export default function PostBody({ content, cmsUrl, frontendUrl }: PostBodyProps) {
  const options: HTMLReactParserOptions = {
    replace: (domNode) => {
      // Intercept img tags in the document object model
      if (domNode instanceof Element && domNode.name === 'img') {
        const { src, alt, width, height, className } = domNode.attribs;

        if (!src) return;

        // Clean domain url (rewrite backend CMS host to frontend host)
        const cleanSrc = src.replace(cmsUrl, frontendUrl);

        // Parse attributes, fallback to common banner dimensions if missing
        const imgWidth = width ? parseInt(width, 10) : 800;
        const imgHeight = height ? parseInt(height, 10) : 450;

        // Optimize LCP: Set priority loading for the first image in content if it is above-the-fold
        const isFirstImage = domNode.parent?.children.filter((c: any) => c.name === 'img')[0] === domNode;

        return (
          <Image
            src={cleanSrc}
            alt={alt || 'Headless WordPress article image'}
            width={imgWidth}
            height={imgHeight}
            className={`${className || ''} w-full h-auto rounded-xl border border-gray-200 dark:border-gray-800 my-6`}
            sizes="(max-width: 768px) 100vw, (max-width: 1200px) 75vw, 60vw"
            loading={isFirstImage ? 'eager' : 'lazy'}
            priority={isFirstImage}
            quality={85}
          />
        );
      }
    },
  };

  return (
    <div className="prose prose-lg max-w-none dark:prose-invert prose-headings:text-gray-900 dark:prose-headings:text-white">
      {parse(content, options)}
    </div>
  );
}
Using this component ensures that the browser reserves appropriate layout boxes for images before their source pixels are fetched, eliminating CLS.
Balancing Rendering Performance and Crawlability
To achieve the best possible page experience, you must align your image optimizations with an appropriate site-wide delivery strategy. The method used to pre-render the page shell containing these images directly influences both Edge CDN cache efficiency and organic bot crawling access times.
Here is a technical comparison of the three primary rendering strategies available for decoupled architectures:
| Rendering Strategy | SEO / Page Speed Impact | WordPress Decoupled Suitability |
|---|---|---|
| Static Site Generation (SSG) | Outstanding: Pages are compiled to static HTML, yielding sub-50ms load times and immediate crawler indexation. | Best for marketing pages, brochures, and blog posts with low update frequencies. |
| Server-Side Rendering (SSR) | Excellent: Renders HTML dynamically on the server for each request, keeping search bots from running client-side JS. | Ideal for highly dynamic listings, search result templates, or personalized storefront layouts. |
| Incremental Static Regeneration (ISR) | Outstanding: Statically pre-builds core pages, then rebuilds updated URLs on-demand in the background. | The Enterprise Standard: Best choice for large blogs and catalogs, updating content instantly without triggering full rebuilds. |
Frequently Asked Questions: Headless WordPress SEO
Here are answers to the most common questions about optimizing a decoupled WordPress and Next.js website for organic search engine visibility.
Does headless WordPress hurt SEO?
No, headless WordPress does not inherently hurt SEO. In fact, by utilizing modern frameworks like Next.js or React for server-side rendering (SSR) and incremental static regeneration (ISR), you can dramatically improve page load speeds and Core Web Vitals (such as LCP and CLS), which are major ranking factors. Moreover, by minimizing main-thread JavaScript execution blocks, a decoupled frontend ensures extremely low Interaction to Next Paint (INP) latency, maintaining a highly responsive user experience. However, because decoupling removes the automated theme layer of monolithic WordPress, you must manually configure critical search elements such as canonical tags, dynamic XML sitemaps, and redirects to prevent indexation errors.
Can you use Yoast SEO or Rank Math with headless WordPress?
Yes, you can fully leverage Yoast SEO or Rank Math in a decoupled architecture. These plugins store metadata in the WordPress database, which can then be queried via WPGraphQL or the REST API. On the frontend, Next.js fetches this metadata during build time or server rendering and maps it directly to the native Metadata API. This keeps the editorial flow intact while ensuring search crawlers receive identical title tags, meta descriptions, and Open Graph attributes.
How do you handle WordPress redirect rules in Next.js?
Because WordPress no longer serves the frontend request, database-driven redirect rules configured inside monolithic plugins will not fire. To sync these rules, you must fetch the redirect mappings from the WordPress database via an API endpoint and evaluate them using a Next.js Edge Middleware engine. This redirects users and crawlers at the CDN edge before rendering the page shell, protecting your Time-to-First-Byte (TTFB) performance and preventing 404 search rank drops.
How do you synchronize XML sitemaps in headless WordPress with Next.js?
To generate sitemaps, you should disable the default WordPress XML sitemap templates and create a dynamic Route Handler (app/sitemap.ts) in Next.js. This script programmatically queries all page and post slugs using GraphQL or WPGraphQL, replaces the backend API domain with your public frontend domain, and compiles a real-time XML index map. This ensures that new content is indexed instantly by search engines without triggering a full site rebuild.
Unified JSON-LD Schema Markup for Headless SEO
To maximize search visibility and qualify for rich snippets, search engines require structured metadata. In a headless setup, you must compile and render these schema objects manually.
Below is a complete, combined JSON-LD schema structure that integrates BlogPosting, BreadcrumbList, and HowTo schemas into a single, unified @graph block. This approach avoids redundant metadata declarations, reduces page weight, and establishes a clear relationship between the content, its structure, and the author:
{
  "@context": "https://schema.org",
  "@graph": [
    {
      "@type": "BlogPosting",
      "@id": "https://whoisalfaz.me/blog/headless-wordpress-seo-nextjs-guide/#post",
      "isPartOf": {
        "@id": "https://whoisalfaz.me/blog/headless-wordpress-seo-nextjs-guide/"
      },
      "headline": "The Headless WordPress SEO Blueprint: Next.js 15 Integration Guide",
      "description": "Learn how to optimize headless WordPress SEO in Next.js 15. Prevent CLS on images, sync redirects, resolve canonical loops, generate dynamic sitemaps, and deploy draft previews.",
      "url": "https://whoisalfaz.me/blog/headless-wordpress-seo-nextjs-guide/",
      "mainEntityOfPage": "https://whoisalfaz.me/blog/headless-wordpress-seo-nextjs-guide/",
      "datePublished": "2026-06-28T00:00:00+06:00",
      "dateModified": "2026-06-28T00:00:00+06:00",
      "author": {
        "@type": "Person",
        "name": "Alfaz Mahmud Rizve",
        "url": "https://whoisalfaz.me/about/alfaz-mahmud-rizve/",
        "sameAs": [
          "https://github.com/whoisalfaz",
          "https://linkedin.com/in/whoisalfaz"
        ]
      },
      "publisher": {
        "@type": "Organization",
        "name": "whoisalfaz.me",
        "logo": {
          "@type": "ImageObject",
          "url": "https://whoisalfaz.me/images/logo.png"
        }
      },
      "image": "https://whoisalfaz.me/images/blog/headless-wordpress-seo-nextjs-guide-featured.png"
    },
    {
      "@type": "BreadcrumbList",
      "@id": "https://whoisalfaz.me/blog/headless-wordpress-seo-nextjs-guide/#breadcrumb",
      "itemListElement": [
        {
          "@type": "ListItem",
          "position": 1,
          "name": "Home",
          "item": "https://whoisalfaz.me/"
        },
        {
          "@type": "ListItem",
          "position": 2,
          "name": "Blog",
          "item": "https://whoisalfaz.me/blog/"
        },
        {
          "@type": "ListItem",
          "position": 3,
          "name": "Headless WordPress SEO Guide",
          "item": "https://whoisalfaz.me/blog/headless-wordpress-seo-nextjs-guide/"
        }
      ]
    }
  ]
}
To implement this dynamically inside your Next.js page template, wrap the structured object inside a reusable React Component:
// components/SeoSchema.tsx
import React from 'react';

interface SchemaProps {
  post: {
    title: string;
    slug: string;
    description: string;
    datePublished: string;
    dateModified: string;
    imageUrl: string;
  };
}

export default function SeoSchema({ post }: SchemaProps) {
  const postUrl = `https://whoisalfaz.me/blog/${post.slug}/`;
  const authorUrl = 'https://whoisalfaz.me/about/alfaz-mahmud-rizve/';

  const jsonLd = {
    "@context": "https://schema.org",
    "@graph": [
      {
        "@type": "BlogPosting",
        "@id": `${postUrl}#post`,
        "isPartOf": { "@id": postUrl },
        "headline": post.title,
        "description": post.description,
        "url": postUrl,
        "mainEntityOfPage": postUrl,
        "datePublished": post.datePublished,
        "dateModified": post.dateModified,
        "author": {
          "@type": "Person",
          "name": "Alfaz Mahmud Rizve",
          "url": authorUrl,
          "sameAs": [
            "https://github.com/whoisalfaz",
            "https://linkedin.com/in/whoisalfaz"
          ]
        },
        "publisher": {
          "@type": "Organization",
          "name": "whoisalfaz.me",
          "logo": {
            "@type": "ImageObject",
            "url": "https://whoisalfaz.me/images/logo.png"
          }
        },
        "image": post.imageUrl
      },
      {
        "@type": "BreadcrumbList",
        "@id": `${postUrl}#breadcrumb`,
        "itemListElement": [
          {
            "@type": "ListItem",
            "position": 1,
            "name": "Home",
            "item": "https://whoisalfaz.me/"
          },
          {
            "@type": "ListItem",
            "position": 2,
            "name": "Blog",
            "item": "https://whoisalfaz.me/blog/"
          },
          {
            "@type": "ListItem",
            "position": 3,
            "name": post.title,
            "item": postUrl
          }
        ]
      }
    ]
  };

  return (
    <script
      type="application/ld+json"
      dangerouslySetInnerHTML={{ __html: JSON.stringify(jsonLd) }}
    />
  );
}
Deploying a Bulletproof Headless WordPress Stack
Decoupling WordPress from your frontend offers unmatched design freedom, speed improvements, and security enhancements. However, a successful headless launch requires careful coordination of API configurations, server caching layers, redirect syncing, and custom sitemaps.
If you are an agency seeking to package headless React sites for clients or an enterprise brand ready to migrate to a decoupled stack without losing your organic ranking positions, we are here to help.
Through my Headless Architecture Consulting services, I audit meta tags, build edge redirect scripts, and configure Faust.js previews.
Beyond core engineering, we provide technical integrations across your entire marketing ecosystem:
- n8n Automation & RevOps: Connect client-side forms to CRMs and email lists via automated serverless pipelines.
- Custom Full-Stack Development: Construct high-converting web applications with custom database connections.
- Growth SEO & Marketing Consulting: Design content strategies that build domain authority and capture buying-intent search traffic.
To learn more about my background, read my bio on Alfaz Mahmud Rizve or get in touch today.
Complementary RevOps Toolchain
n8n Cloud
The most powerful fair-code automation platform. Get 20% off your first year on any paid plan.
Vultr High-Performance VPS
Deploy self-hosted instances worldwide with enterprise NVMe storage. Get $300 in free credit.
Brevo (formerly Sendinblue)
Enterprise-grade email API and marketing automation. Excellent SMTP for n8n.
In this Article
Ready to automate your agency?
Skip the manual grunt work. Let's build a custom system that runs your business on autopilot 24/7.